Bring up the first router
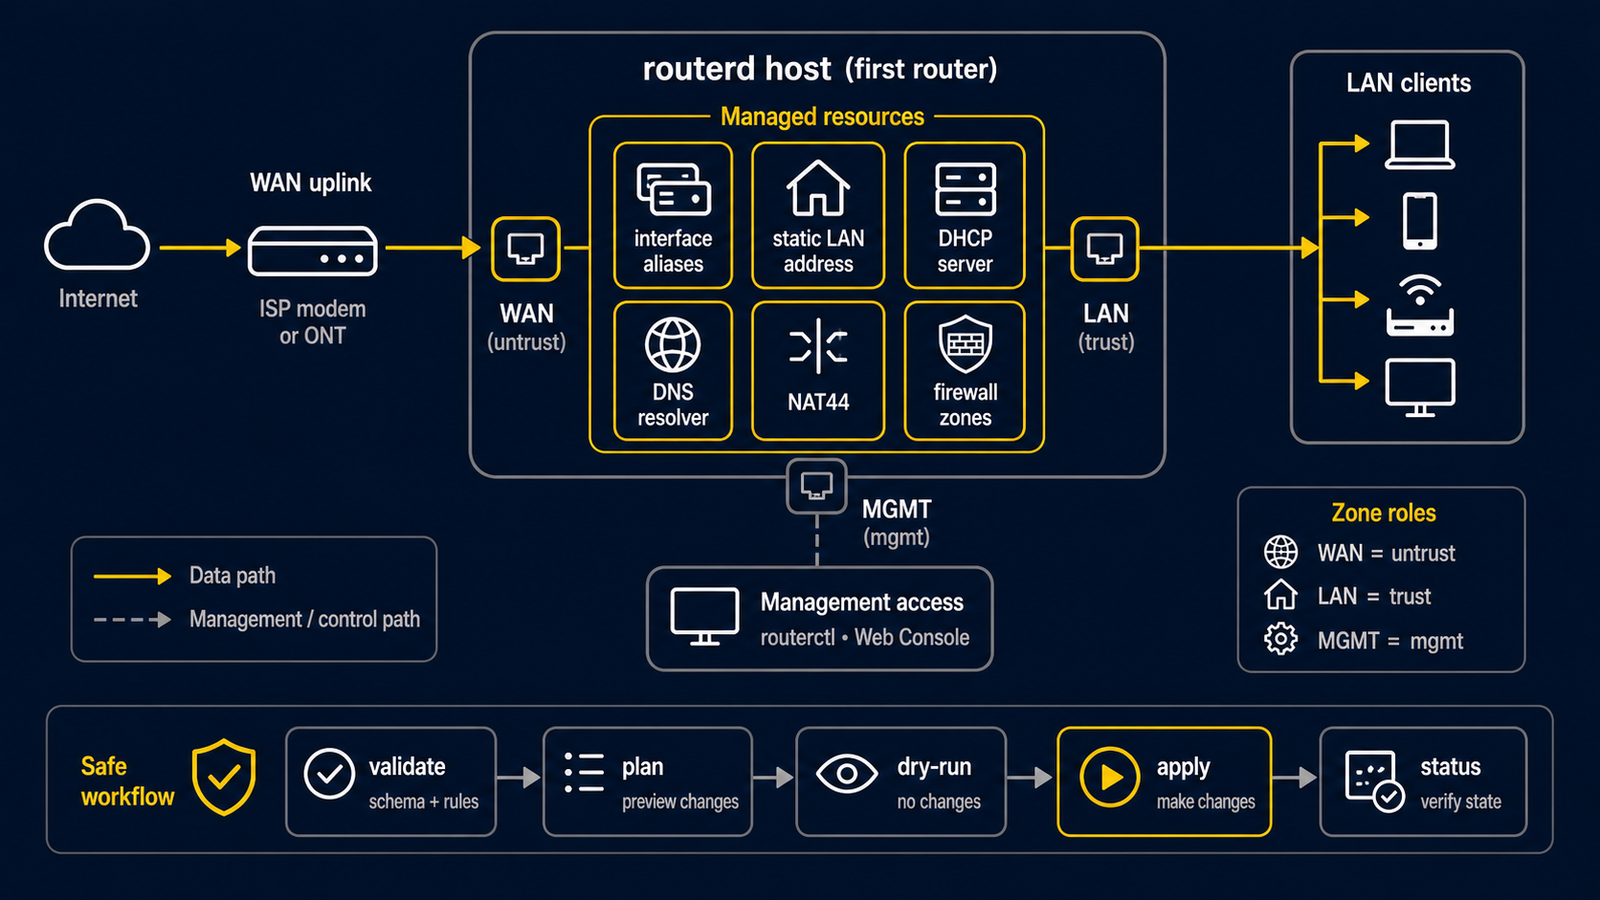
This tutorial brings up the smallest possible routerd configuration: one WAN interface that gets its IPv4 address from DHCPv4, and one LAN interface with a static IPv4 address.
apiVersion: routerd.net/v1alpha1
kind: Router
metadata:
  name: first-router
spec:
  resources:
    - apiVersion: net.routerd.net/v1alpha1
      kind: Interface
      metadata:
        name: wan
      spec:
        ifname: ens18
        adminUp: true
        managed: true

    - apiVersion: net.routerd.net/v1alpha1
      kind: Interface
      metadata:
        name: lan
      spec:
        ifname: ens19
        adminUp: true
        managed: true

    - apiVersion: net.routerd.net/v1alpha1
      kind: DHCPv4Client
      metadata:
        name: wan
      spec:
        interface: wan

    - apiVersion: net.routerd.net/v1alpha1
      kind: IPv4StaticAddress
      metadata:
        name: lan-address
      spec:
        interface: lan
        address: 192.0.2.1/24
DHCPv4Client is owned by routerd-dhcpv4-client, the routerd-managed DHCPv4 daemon. routerd does not delegate to an OS-bundled client; the daemon publishes its state under the same contract as every other routerd daemon (/v1/status, lease.json, events.jsonl).
Before applying for real, validate the configuration and preview the plan:
routerctl validate -f first-router.yaml --replace
routerctl plan -f first-router.yaml --replace
Confirm that your management connection (SSH on the LAN, console, or hypervisor console) will survive the change, then apply without --dry-run.
Next
- WAN-side services — DHCPv6-PD, PPPoE, DS-Lite
- LAN-side services — DHCP, RA, DNS, local zones
- Basic NAT and firewall policy