Getting started
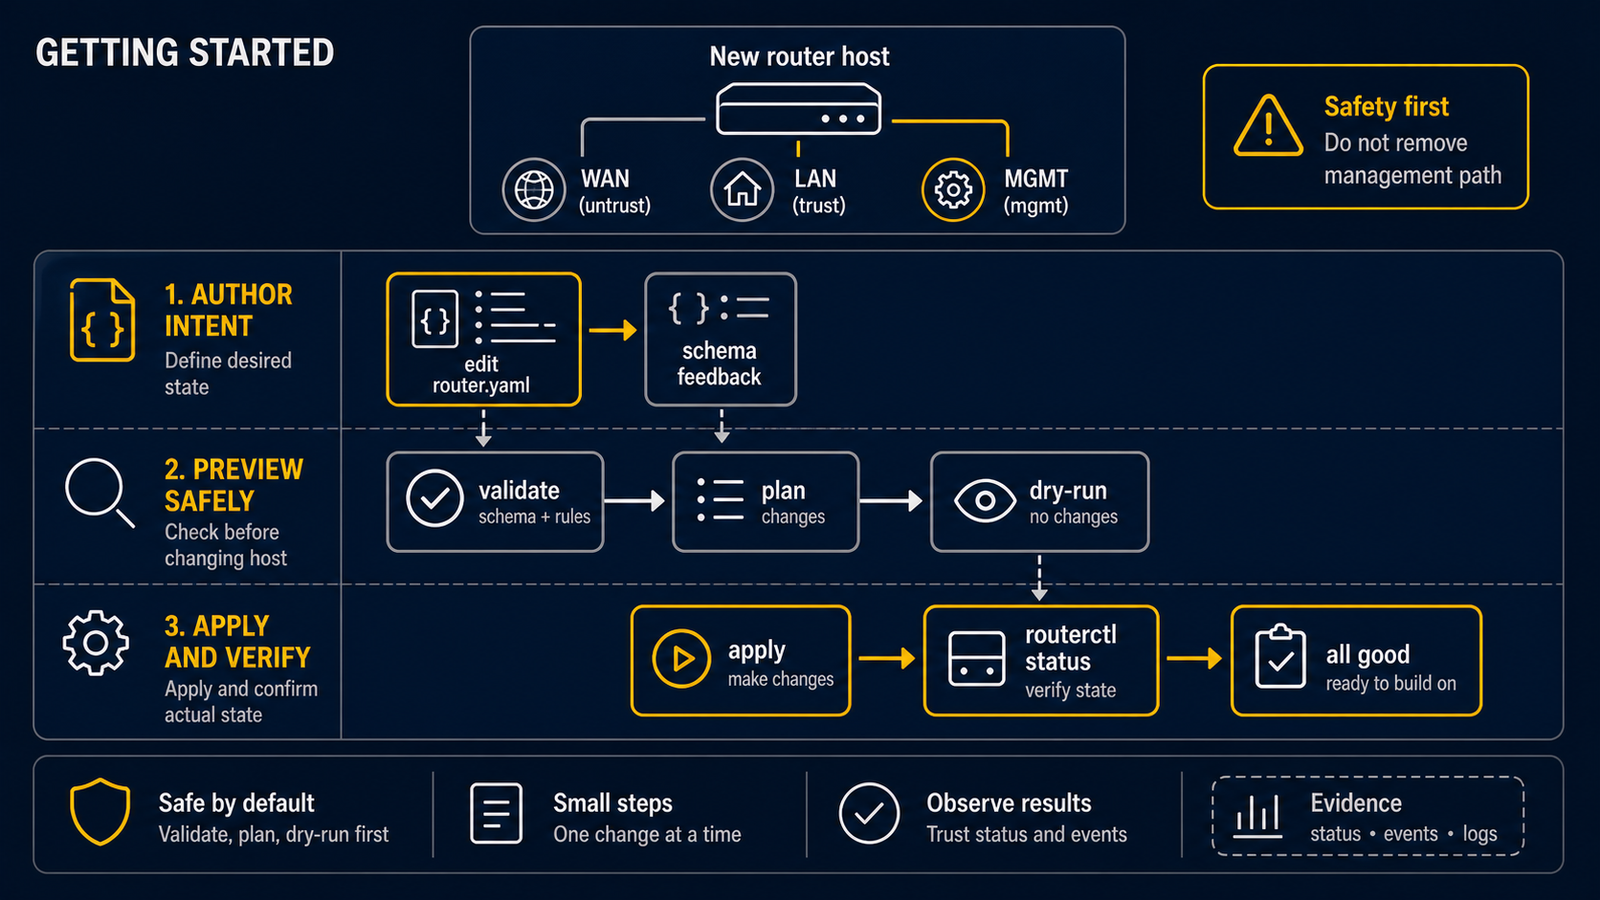
This tutorial shows the safest first loop:
- write a small router resource file
- validate it
- inspect the plan
- run a dry application
- only then run the daemon
The first pass should not change the host network.
Install routerd first with the release archive and install.sh.
See Install and upgrade for the OS-specific steps.
1. Check interface names
ip link
The examples use ens18 for WAN, ens19 for LAN, and ens20 for management.
Use the names from your host.
Keep the management path separate from the interface being changed. Do not test a first configuration over the same interface that routerd is about to adopt.
2. Start with interfaces and host bootstrap
apiVersion: routerd.net/v1alpha1
kind: Router
metadata:
  name: first-router
spec:
  resources:
    - apiVersion: system.routerd.net/v1alpha1
      kind: Package
      metadata:
        name: router-host-tools
      spec:
        packages:
          - os: ubuntu
            names: [dnsmasq, nftables, conntrack, iproute2]

    - apiVersion: net.routerd.net/v1alpha1
      kind: Interface
      metadata:
        name: wan
      spec:
        ifname: ens18
        adminUp: true
        managed: true

    - apiVersion: net.routerd.net/v1alpha1
      kind: Interface
      metadata:
        name: lan
      spec:
        ifname: ens19
        adminUp: true
        managed: true
Router features derive their host runtime needs from the resources you declare.
Use Package, Sysctl, or SysctlProfile only as narrow escape hatches when a
package or kernel setting is not yet derivable.
3. Validate
routerctl validate -f first-router.yaml --replace
Validation checks the resource shape before routerd touches the host.
4. Inspect the plan
routerctl plan -f first-router.yaml --replace
Use the plan to catch accidental interface names, missing dependencies, and host artifacts that routerd would create.
5. Dry apply
routerctl plan -f first-router.yaml --replace
Dry application exercises resource loading, dependency ordering, and generated artifacts without committing network changes.
6. Run the daemon when the plan is safe
sudo routerd serve --config first-router.yaml
In production, install routerd with the packaged service manager files so that
routerd serve starts on boot.
7. Inspect status
routerctl get status
routerctl get events --limit 20
routerctl get connections --limit 50
The next tutorials add LAN DHCP, RA, DNS, route policy, NAT44, and DS-Lite.
Next steps
- WAN-side services — configure DHCPv6-PD, PPPoE, DS-Lite, or DHCPv4 WAN
- LAN-side services — add DHCPv4 scopes, RA, DNS, and NTP
- Basic firewall — enable three-role firewall zones
- routerctl doctor — check router health after applying